Wednesday, November 10, 2010

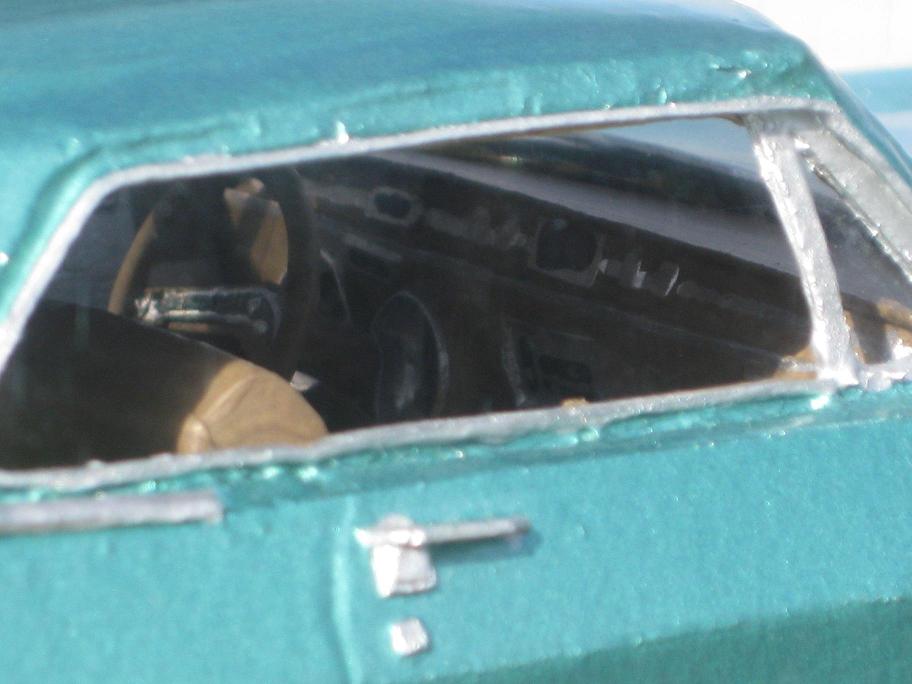
1957 Chevy Bel Air 4 door Sports Sedan Hardtop 1/25 scale model.


Here is a model of my all time favorite collectible car that I have owned. This is an exact scale model of my first '57 Chevrolet Bel Air 4 door hardtop that I got by trading even up with a buddy I worked with in 1980 for a 1965 Corvair Monza convertible that I was restoring at the time, but I wanted a '57 Chevy more than I wanted a Corvair. When my dad found out that I did this, he was not too happy, and eventually he forced me to sell the car because he said "That big ugly yellow canary will never be worth anything, get rid of it or move out!!" I could not afford to live on my own yet, so I sold the car, after I spent about $700.00 more in 1980 dollars in the start of it's restoration in parts and services. I even got new floor braces, and replacement floor pans for the thing, a rebuilt 1965 Chevelle 283, a rechromed rear bumper assembly, new stock wheels, and hubcaps, and new glass for the driver's side front door. That did not matter, my dad still made me sell it, and I took a beating financially on that car, as I only got $500.00 for the thing, in March of 1983!! Needless to say I was very upset at my dad for forcing me to sell the thing. I still get upset at him for making me do this, as a restored '57 Bel Air 4 door hardtop can now fetch as much as $30,000!! I tried to tell my dad this, but he really does not even want to here it. So be it. When I came home with a 1965 Cadillac Calais coupe later that summer, he liked that car, so everything was at peace on the surface, for the time being.

That is another story for later.

After the '57 was gone, I set out to build a scale model of the thing in around 1984. I used two AMT 1957 Chevy Bel Air 2 door hardtop kits, and one Jo-Han/Ex-el products promotional model re-issue of a 1956 Pontiac Star Chief 4 door hardtop, which uses the exact 4 door HT roof that the 1956, and 1957 Chevys used in the actual cars. So I cut the roof off the Pontiac model. Then After I removed the 2 door HT roof off the Chevy body, I cut the interior hole longer on the cross panel in front of the trunk lid, by making that panel narrower, so it would accomidate the longer modified interior box. I removed the back seat coupe arm rests, and made the rear seat itself, longer, made back door interior panels, and removed the notch that the front seat had, to make a solid front bench seat back, like a fixed sedan front seat would be like. On the body, I shaved off the coupe door handles, filled in the 2 door coupe door lines, and sanded it smooth. Then I scribed the 4 door HT door lines, and sculpted 4 new plastic door handles for the car, and glued them to the doors. After that was done, I glued the Pontiac 4 door roof on, tweaking it quite a bit to get it to fit. Next, I dry fitted the "glass". After that,I dry fitted the new interior box. After I got everything to fit satisfactory, I did all the paint work, and was able to assemble the rest of the model, as per the stock AMT kit's instructions. Oh, yeah, on the front grille, I cut out the grille top bar, and attached it to the hood, like the real car is done.

Even though, I did this model 26 years ago, now, I think it still came out really nice, considering all the work I had to do to the thing to get the results I wanted . And that is a scale model of a 1957 Chevrolet Bel Air "Sports Sedan" 4 door hardtop!

Please check out this new update post I did about this model, as you the viewer have made this my most popular post, so I decided to do new photos of the model, and more info on how and why I built it.
Here is the link.

http://jayveejayaresjunk.blogspot.com/2012/08/1957-chevy-bel-air-4-door-sports-sedan.html

Addendum;  February 3, 2013.

To the  people of the '55-'56-'57 Classic Chevy Club France, I sincerely thank you for your kind remarks on your forum. I wish I knew French so I could join your forum and talk more about this model, which I built 29 years ago in 1984. I am thinking about building a second 4 door hardtop in India Ivory and Canyon Coral (pink) as I now own a real one in this color scheme. Your remarks, again are much appreciated!--Jim.

Jim.


Tuesday, November 9, 2010

1969 Buick Electra 225 coupe 1/25 scale model "half & half" scratch build.


Here is a model that I actually built before I built the model of the green Electra coupe on my last post. This is a scratch built model of my 1969 Buick that I got in the spring of 1978 to replace the green '65 that I was driving.

This model entailed the use of an AMT 1969 Buick Wildcat kit that I had to very highly modify to turn it into a 1969 Electra coupe. From the back edges of the doors to the back bumper, inclusive, including the back half of the roof is entirely made out of carved, and sanded to shape balsa wood. This was not an easy job, as the Electra's back end is a completely different shape than the back end of the Wildcat, but the front of the car is basically the same. The front grille had to be cut out of the front bumper frame assembly, as the Electra has an egg crate style grille, whereas the wildcat has a more linear grille. I also had to cut the headlight assemblies from the Wildcat grille, so I could glue them to the Electra grille, which I made from small pieces of aluminum screening, which I then painted silver to try to hide the woven look of the screen mesh, to try to make the squares look more like a flat surface. On the front fenders, behind the wheel openings, I had to file/sand off the Wildcat "louvres" that were there, and replace them with the Electra quad portholes that are above the "sweep spear" moulding line above, and behind the front wheel opening, but in front of the door. The portholes are made out of thick gauge paper, as are the wide rocker and quarter panel mouldings that are on the model. The rear window "glass" is acetate. Before I painted the body, I sealed the balsa surface with balsa sanding sealer, sanded it again after that, and repeated until I got the wood surface as smooth as I felt that I could get it. Then I scribed the lines for the rear fender skirts, and the trunk lid. Then I attached the trim, ready for paint. The body was then detail painted, then, I was able to assemble the model normally using the rest of the parts that the kit came with.

This model is FAR from perfect, but it is a model of one of the cars that I drove in my early years. Why model manufacturers ignore the Electra 225 , I do not understand!! It is one of the most consistently beautiful cars, year after year, that GM ever built. Long live the "Deuce and a Quarter"!!

This model was custom built in 1979, when I was 21 years old.

Jim.

May 24, 2011-- P.S.- I just found the negative to what I thought was a lost picture of me with my 1969 Buick Electra 225 Custom coupe taken in May of 1978. I'm 20 years old here.--- There is also another reprint of an old picture from the same negative strip of the actual car that I had, parked along the street in Lancaster PA, where I grew up. Also, I added three more images of the model that I took at the same time as the other pics of the model, but I never posted them, until now. JRVJR.


Wednesday, April 7, 2010

1965 Buick Electra 225 coupe 1/25 scale model


When I was in my junior year in high school, my dad and I put our money together, and we bought a 1965 Buck Electra 225 coupe in the spring of 1975 for $300.00. I absolutely LOVED that car. That old 401 nailhead V8 was the most reliable engine that I ever drove. This car had more power than a then teenage boy could ever want for "showing off" in this car, and I did that very well to say the least, much to the chagrin of my dad. Needless to say, I drove to school in this chrome laden behemoth, and most of my friends thought it was a cool car. It was a light metallic green with a beige interior, loaded with A/C, and power everything.

Of course, back then, when I bought cars, I always wanted a scale model of the thing to remember it by, after the real thing was long gone. When I found out that AMT never did this as a scale model in '65, I was disappointed. But in July of 1976, I made a four view blueprint drawing of the car, because my dad and I still had the thing, but it was starting to wear out. That following spring, my dad let me trade the car in on a 1969 Buck Electra 225 coupe in brown and beige. We thought the car left the city, but one day when I was riding my bike in the city, the car showed up on a used car lot for $600.00, and my dad bought it back. But I had what I thought was a nicer car, and didn't care about the old '65 anymore. Or at least I thought. Time went by, but I never totally forgot about that car. Around 1987, I dug the old four view drawing out, and ran off some photocopies of it, so that I could modify it. When I originally made the drawing, my intentions were to sculpt build the model out of balsa wood. I really studied the shape, and lines of the car, and I thought that I could modify the drawing enough to make the model entirely out of posterboard. Let me put it this way. It was not easy,but I made it work because the car really does have very straight lines, except for the compound curves on the backside of the roof. Using Elmers Glue as a body filler, I was able to reproduce those compound curves by notching the posterboard at right angles to the first curvature that I would put in the posterboard, then pulling those little notches closed. The results are a very nice curved surface in two directions at the same time, like the real car has.The model is far from perfect, but you must consider that this model's body is totally scratch built out of what amounts to be cardboard. I did make some concessions on this little project. The wheels, axles, and interior box are from a Jo-Han 1977 Cadillac Coupe deVille snap kit. I drastically modified the parts, particularly the interior to look like a 1965 Buick Electra interior, using paper, cardboard, and scrap plastic. Then I fitted the interior tub to the body after I fitted the acetate plastic windows to the body, The outside of the body was painted, and detailed first, then the window "glass" was put in. Then I put in the headliner in with all it's garnish mouldings, and then I painted it. Then I installed the completed interior box. The chassis plate is also posterboard, fully detailed with the rear axle, frame, exhaust system, lower a-arms,and the bottom of the engine and transmission are glued on to the chassis plate, to give the bottom of the model an embossed look. I put inner fenders on the chassis plate, so that when you look at the model from the side, you do not see daylight between the wheel openings, and the tires. The chassis plate was painted black before I glued it to the body, completing this one of a kind model. As you can see, I tried to paint this model up like my actual car, but I must admit, my model is brighter green than the real one was. The hood does not open, as this model is done up like a dealer promotional model, which made things alot simpler for me to do, not having to totally duplicate the complete engine compartment.

Here is a link to my new post on this model with new better and unobstructed photos of the model in more detail.

 http://jayveejayaresjunk.blogspot.com/2012/07/1965-buick-electra-225-coupe-125-scale.html

Jim.


Friday, February 12, 2010

"Pizza box" building models

Before I built any other kinds of models, when I was a young kid, I would build models of houses, and famous buildings out of what they now call posterboard. My parents, and I used to call it "shirt cardboard" because new shirts that you would buy in the stores usually were packed with a rectangular piece of cardboard to stiffen the package bag that it was in, plus about 30 million pins! I would use this shirt cardboard to cut up, and make model buildings out of it, because my parents were not exactly rich. My dad used to buy also alot of pizzas that came in the same type of cardboard boxes, that new and starched shirts came packed with. I LOVED pizza boxes, because it would yield alot of material for me to make bigger models with. My dad showed me how to do this around the spring of 1964, by showing me how to make a "birdhouse" out of the stuff, incorporating tabs and slots into his design, held in place with scotch tape. I took his basic design concepts, and ran away with them. I used to LOVE to build models of churches, and houses, the most. I would draw on the details, such as stairs, doors, and windows with pencils, and crayons, markers, and pens. Since I liked do this so much as a six year old kid, my mom, really started to trust me enough to let me use her really sharp scissors. I was able to keep her trust, for I knew, at a young age, that they were SHARP, and I never did cut myself with them.From 1964 to about 1973, I probably built about forty models. The later ones graduated from tape to Elmer's Glue, which is much stronger, and more durable. Due to time, age, circumstances, attrition, and a destructive temper in my younger years, only three from 1971-1972 survived to today. The first one is the Taj Mahal. I built this in August of 1971, when I was thirteen.I developed an extreme fascination and love for this building in 1966, after I saw a scene of it in ruins in the movie, "The War Of The Worlds", on TV,on "NBC (name your day) Night At The Movies" I still love the building, today. The second survivor is Christ Evangelical Lutheran Church in Lancaster, PA, where I was baptized as an infant, and where we attended until about 1968. This is a neat red brick building that I actually modeled three different times. This is the second model, which I built in November of 1971, out of a white pizza box. I actually built it one more time after this, in 1989, but with much more correct coloring, and 1000% more relief detail. The third survivor is a model that I built for my ancient history class, but I did not want to turn it in, because every time I would turn a model in to my history teacher, she wanted to keep them, because she thought for a kid, my modeling was exquisite!! So I kept it. Still have it today. this was also the last model that I built out of plain white posterboard, with draw on details. It was built in three days,in March of 1972, and it is the Cathedral of Notre Dame de Paris. I built this model,using a grand total of two photographs. One of the main facade, the other a 3/4 view of the back , photographed from the Seine river. This model, although it has some age, and silverfish damage, is in the best condition, of these three surviving "pizza box models"

Jim.


Saturday, July 4, 2009

Celebrating the Heritage of Schwinn


Here is a photo I took of two of my antique Schwinn bikes with my son's 2003 Schwinn S-30 21 speed all terrain bike. To the left of that is my 1959 Mk.IV Jaguar 3 speed,which I have owned since 1978. To the right is my all original 1967 Collegiate 5 speed in violet, that I got in 2007.

Jim.

Saturday, June 20, 2009

Reconditioned, NOT restored 1949 Schwinn B-6 "Autocycle"

Here is a bicycle that I bought from a guy in Chicago over eBay in November of 2003. The man said that the bicycle was stored in pieces in a very old garage for fifty years. A "garage" find, if you will. The only things wrong, and/or missing from it were; the front wheel with the front drum brake set up, the original kickstand was badly bent, and the original seat pan needed repainted, and reupholstered in new cowhide leather. The original leather was dry rotted off.

The bike came to me in pieces, like I said,but EVERY, and I mean EVERY original screw, nut, washer, and other fasteners,were ALL THERE!! I find that to be incredible. What I did,was I completely broke the bike down the rest of the way, to the bare frame, and other components, totally cleaned, greased, and did very minor touch up paint work to the components. The original decal graphics were too far gone to save, so I got new decals for it from Martin's Bike Shop, in Hinkletown, PA, which is on US Route 322, just east of a town called Ephrata, in northern Lancaster County,PA. They have a lot of the new old restoration stock parts that the new Schwinn bicycle company makes for their old Chicago, USA built bicycle. Schwinn bikes are still made, but like everything else, nowadays, they are made in China. They are still headquartered in California, though. The crank was bent, and the original pedals were shot, so I got repro parts for these, as well as the kickstand. I sent the seat out to California to get recovered with the correct black cowhide,even embossed, with the correct "Mesinger" script, on top, by a dealer who calls himself "SchwinnXChange". Took about a month and a half turnaround time. Although they are in good condition, I could not get the tank horn,and fenderlight to work, so I left them alone. They are clean, and still in the bike though. For me, it is not critical that they work.The fact that they are still there is amazing enough for me. They only major piece of the bike that I had to totally repaint was the rear carrier. I also had to repaint the back cream colored half of the chainguard, as this area was badly scratched up. The " spear" tip on the front edge of the front fender also needed repainted, as well as the black paint in front of that. The cream "wedge" on the bottom edge of the back fender was repainted, too. All the dents were carefully removed( they were very minor), from the fenders, tank, and chainguard, before I did the touchup paint work. Eighty-five percent of the bike's paint is original!! I also redid by hand, the original design red pinstriping, that was very faded, The original fenderlight lens was in perfect shape, so I let it go. I later had to replace it,because something heavy fell squarely on the lens in my hobby room, and cracked it. I still have it, it's just not on the bike. Also had to replace the original chain. it was rusted solid in places, and about 1/4 of the links were cracked. After I did all this, the bicycle was re-assembled into one unit for the first time, from what I was told, since 1954!! I had to wait before I could put it back together, because the original rear wheels finish was shot, and the front wheel, was not even a Schwinn wheel. So, through my dad, I got a very nice set of double knurled Schwinn S-2 wheels, with VERY nice original chrome, from the aforementioned SchwinnXChange, of California, but the front wheel did not have the "Forebrake" drum brake set up that the bike originally had. Then I totally reassembled the bike after this. I only completed the bike last July,(2008) with the "Arnold,Schwinn&Co." front drum brake set up complete with cable, mounting clips, and lever ,from a guy on eBay.

The front fork is the original locking front "Knee-Action" "Cycelock" springer unit.

The rear wheel is equipped with a "New Departure", Model "D" rear coaster brake single speed rear axle.

The rear fender reflector is the original CORRECT unit. Those monster size Phantom reflectors are not correct original equipment for Schwinn B-6's.

The tires are reissue Carlisle "Lightning Dart" Indian head nylon cord whitewall tires.

This bicycle is almost an exact replica of a bicycle that my dad bought brand new as a teenager in the late 1940's. That's why I did this project.

Here are pictures of the reconditioned bicycle.

Jim.


Saturday, June 13, 2009

The OLD Hotel Brunswick, Lancaster,PA scale model


This first image was the very first artist rendering of what the building was to look like upon completion in late 1914. Then the image was used as the Brunswick's first post card,where I got this image from. This is a very rare post card that has a post mark of what I believe is the early 1920's.
Here is the Brunswick, shortly after completion,(around 1914).

Here is the Brunswick sometime in the 1920's or early 1930's after they added on to it.Here is a Lancaster Newspapers photo of the first night of demolition of the building on May 1, 1967.


Here is a model that took about a year to research,and plan, and about six years to complete. I started the work on this model in February of 1994, and finished building it in 2001. It took me that long to build this because the actual building was demolished in May of 1967. I watched them tear this beautiful Beaux Arts style building down as a nine year old that year. I look back on it now,and i still think, "What a waste!!"
Built in 1914,the hotel was well known for its Pennsylvania Dutch hospitality, and it great "home style" food. Also known for its "Seven Sweets & Seven Sours". I haven't figured out what that is yet,even though I was born and still live here in Lancaster County!!

Designed by C. Emlen Urban, the famous Lancaster City architect of the late 19th, and early 20th century, it was built in two stages. The first main part that sat at the corner of East Chestnut street, and North Queen streets, was built in 1914. There were covered entrances on both these streets, but the main entrance was facing Chestnut Street. They added on to the building by making the Chestnut street facade longer, and adding a ballroom hall. This was done in 1925.

It was built by Paul Heine ,an immigrant from Germany. This was the man who started the tourism industry here in Lancaster County, and made this area a fashionable place to visit.

By the 1960's,after Heine's son died, the management ran the hotel into the ground, and it closed its doors in 1964. At this time in American history,people pretty much were going to the suburbs for shopping needs and other purposes, and store owners were quick to do the same to stay in business. People used their cars more to go places rather than walk to stores in center city. Downtown was(is) not very car parking friendly, so people left. It got to the point where most of the store fronts were vacant in that block where the hotel stood. The hotel itself had some stores,at street level.

By 1965, both sides of that block of North Queen streets, and the whole south side of the block of East Chestnut streets , including the nine story tall Brunswick,were declared as "blighted" properties,and I believe that they were seized through Eminent Domain,by the city of Lancaster,via then mayor Monagham. The city got a federal grant to redevelop the blocks, but only they would only get the grant, if they, (the feds) saw the land was cleared first.

Mass demolition of the buildings commenced in the spring of 1965, and was wrapped up in the summer of 1967. Many beautiful building were laid to waste, some even dating back to the colonial era, Victorian, Beaux Arts, and other magnificent structures, including a Greek revival design bank building, complete with a sweeping multistory arch window, and flanking Corinthian columns!! People did try to stop this, but to no avail. You can't stop big government. the signs around the demolition sights stated, ironically,"Tearing Down To Make Way For Progress". What a joke that was.

After the land was cleared, they did put up a new hotel on the same sight where the old Brunswick stood, and it was built as a Hilton Inn. It almost has the exact same "footprint" as the old building did. It is a slab sided monolithic red brick with horizontal white concrete striped structure that still stands today. Ironically,after the Hilton chain sold it to a private company in 1976, they change the name back to the "Hotel Brunswick" to try to appease the people of Lancaster for the loss of one of the most popular hangouts for the locals for generations.....

Here are some pictures of my scale model. The first image is from a vintage post card. One of the other images is is a period Lancaster Newspapers photograph from about 1965.

There are some more historic pictures of the actual building at the beginning, and the end of its existence,also, (the first four pictures of this post).

Jim.


Pensupreme and other vintage milk cartons... do people collect these?

 In the last year, I have noticed how a lot of people collect vintage glass milk bottles, which I remember when I was a kid, how the milkman...