Monday, November 19, 2012

R-34 scale model project...Covering the bow.

Tissue paper was applied in narrow strips, one gore at a time. The strips were cut slightly wider than the space that needed to be covered. If I try to cover more than half the hull at a time, I do not have enough time to wet down the frame with the dope as an adhesive on the frame, to apply the paper, as the stuff dries very quickly. Usually within 4 minutes from the time it is brushed on. I cut each strip ahead of time, applied the dope, then laid the paper on the two stringers, making sure it is put on as smooth and wrinkle free as possible without tearing it. This stuff is extremely delicate to work with, it tears easy! After the strip is in place, I had to brush more dope over the area of the paper where it makes contact with the strip. This gets the adhesive the whole way through the paper, and when it is dry, locks it on the frame. Also to double make sure that it stays on, I have to rub the contact area down with my fingertip to make sure also that the paper has indeed adhered to the frame. I then apply strips to every other gore until I get the whole way around the hull. Then I go one more time around, and start to cover the gores in between the ones I covered the first time around. Where the paper overlaps, those seams must be sealed with dope to smooth the seams over, and make the cover look smooth.
 Follow along in this chronological sequence of images as I cover the bow half of the hull.
 As I was applying the tissue paper strips, I had to be really careful NOT to cover the whole strip of paper with the dope, as the middle of the strip between the stringers needs to be unsealed for shrinkage purposes after the entire hull is covered to draw the paper tight to give the model a tight smooth surface, ready for sealing and painting down the road, after it is shrunk. I will explain this later.

 Bow covering completed!


Model aircraft dope is very volatile, and you need to have very good ventilation air flow while working with this stuff as it really reeks bad while you are working with it.


Jim.

Sunday, November 18, 2012

R-34 scale model project... Installing the gondola and lower fin mount filler "plates"/prepping for covering.

After the basic framework was completed, I cut out and fitted these 1/16" sheet stock balsa filler "plates" in where the control car, engine gondolas, and the lower vertical fin mounts on the hull so I would have a more sturdy mount surface for these items. The other three fins mount right to longitudinal stringers so I did not have to install filler plates for them. In the picture where I'm holding the hull framework, the control car mounts on the piece closest to the nose. The two pieces in the middle are for the two midships "wing" cars, and the one in the middle behind them is for the aft engine car. The narrow triangular section behind that is the mount area for the lower vertical fin.
After that was done, the framework was gently sanded smooth, getting it ready to apply the two sealer coats of model aircraft dope, so that the tissue paper that I use to cover the frame will grip it better when I apply the third coat as an adhesive to apply the paper, one "gore" at a time. A "gore" is the space in between two immediate neighboring longitudinal stringers.
The image above shows the framework sealed with the two coats of clear coat dope, ready to cover with tissue paper, after it thoroughly dries for 24 hours. Model had "glasshead" pins placed in the nose and tail of it, so it could be placed in my custom made model airship "rotisserie" jig which allows the hull to be rotated at any angle so I can work on it more comfortably as I cover it, and what not.
This bottom image shows the hull, ready to begin covering. It also shows the water transfer decals that I made using. Testors "Print Your Own Decal System", and my computer's printer. All decals made this way, because computer inkjet printer inks will desolve in water, must be sealed with a decal "binder" which seals the print with a waterproof coating, so the decal can be dipped in water to apply to the model.

Jim.

R-34 scale model project... Running the longitudinal stringers.

Running the 1/16" x 1/16" longitudinal stringers was the last major step in forming the final shape of the hull, so I absolutely had to make sure that they were laid on the disc rings right.

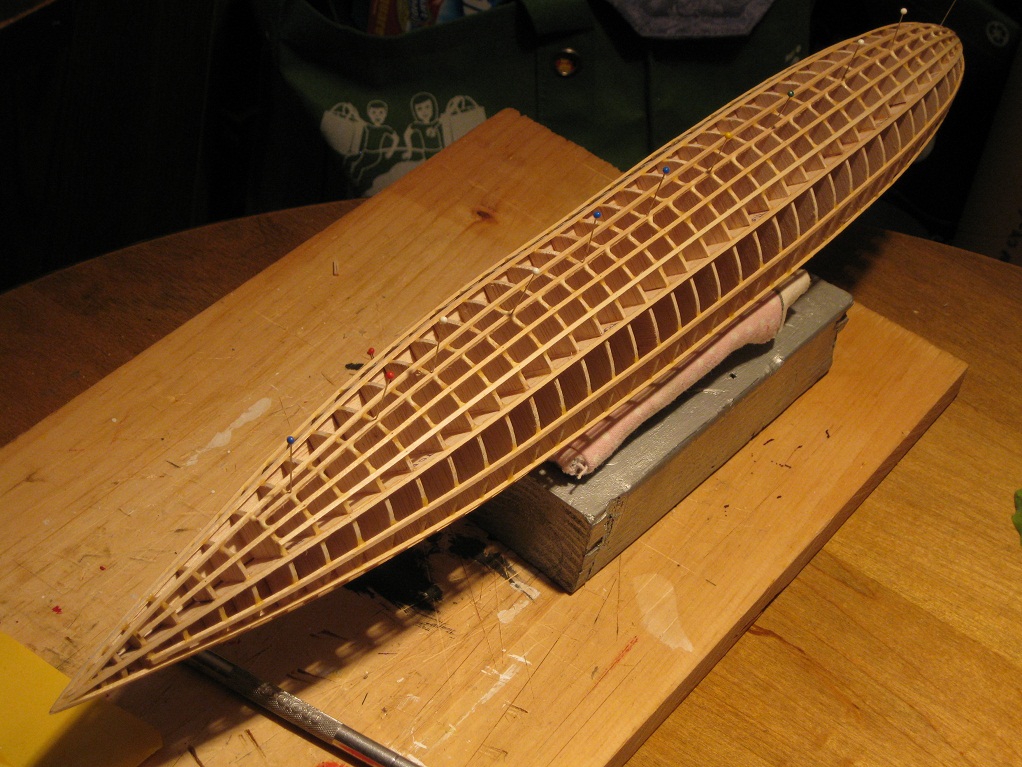
I had to follow a distinct pattern around the hull as the ship in cross-section of the middle part  is a 25 sided polygon, hence the reason why I had to mark the rings every so often along the length of the hull, showing the proper placement of the strips.  From the front of where the fins start to where they end, it drops down to 14 sides, and from that point to the tip of the stern, it drops down to 7 sides. The first strips that I ran were the 7 that run from the tip of the nose to the tip of the tail. Then I ran the other ones that ended at the back ends of the fin mount point at that disc next, then after that, the ones that ended at the front of the fin mount point, at that disc. You can see the different length longitudinals clearly in the last images  of the completed frame work. The first two strips ran were the two that flanked the bottom of the keel, on the bottom of the ship, as shown in the top picture, as the hull is rolled on it's side in that image.
Before I could install any of the stringers, I had to "pre-curve" them to fit the contours of the discs, as if I tried to make them bend without doing this, they would  just snap. So taking my wife's rolling pin, I would roll each stringer. This would have the effect of curving the stringer to the shape of the hull, so it would be easier to glue and pin it in place on the subframe assembly without putting any sharp kinks or cracks in the strip. I would roll the front end of the strip with more pressure for the nose, putting a sharper curve, there. As I got to the middle of the strip, I would ease up on the pressure greatly, but as I got toward the tail, I would increase the pressure again, but not as much like I did for the sharper curve of the nose.
 I would then glue and pin the strip in place, one at a time, overlength at the tail, then after they were in place, I would cut them to their proper length, as to where they were supposed to end at.
Follow along as the final shape of the hull emerges, as I glue and pin on the longitudinal stringers, one at a time.


 Basic hull framework completed!
 Looking more like the R-34!
 After all the longitudinals were in place, all the rough spots were sanded smooth.
Jim.

R-34 scale model project... Building the other side of the hull.

After building the first side of the hull, the second side was built in the same fashion. It went alot faster, though. The pieces were already fabricated, so other than on some of the disc quarters that needed trimmed or added to, to fit, it was just glued it together by matching up the numbers.

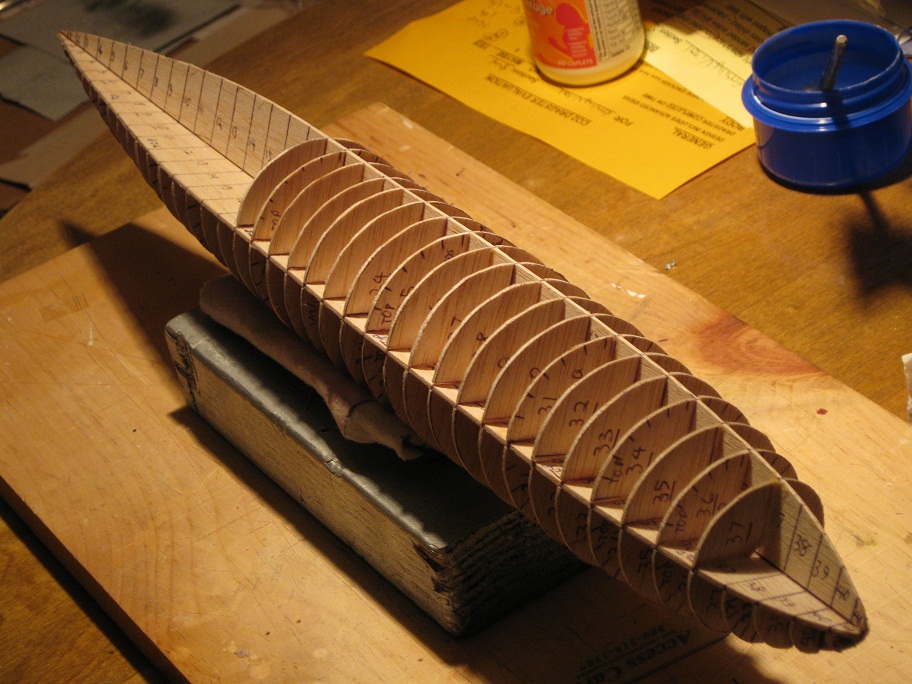
On about every fourth disc, I would first align them up on my ring marking template on the left, below the airship plan, to mark where the 1/16"x 1/16" longitudinal stringers were to run down the discs of the hull that give the ship it's final shape. You can see those marks on the chosen half discs laying in the ready on my reference board, to the right.
Follow along as I assemble the starboard side of the hull sub-frame in this chronological sequence of images from January of 2012.


  Remaining  half-discs ready, stacked up in order to cut in half again, to install on the hull sub-frame.


  Nose shot of the assembly.
  Completed!
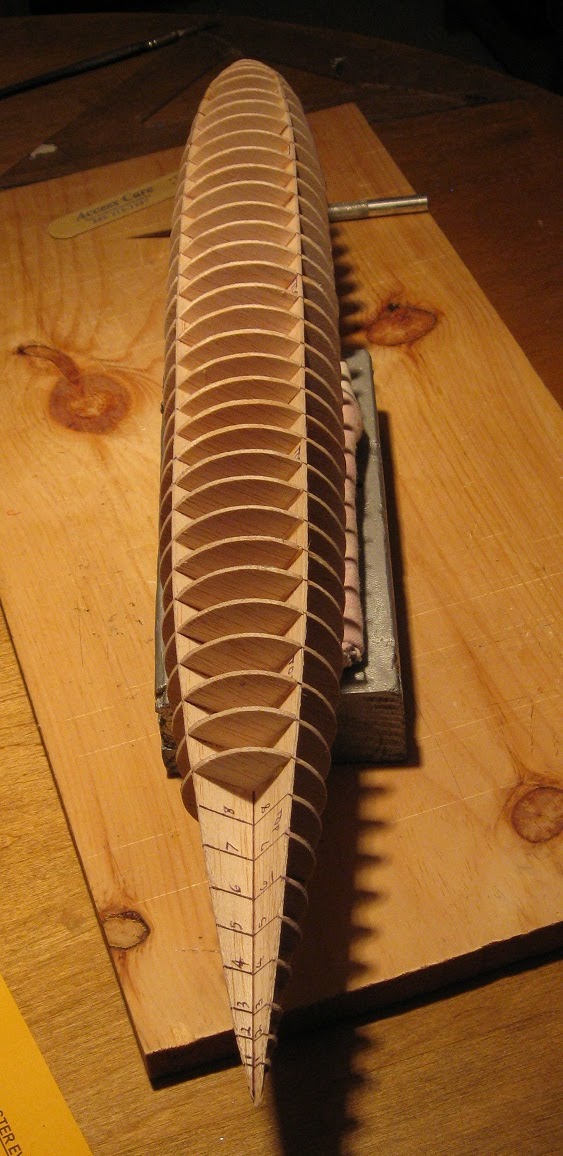
 Dead-on shot of the stern.
  Last three images show the completed hull sub-frame.
Laying on the reference plan to make sure everything is within visual tolerances, and the corresponding discs line up, and proportions look correct.
After I completed the hull sub-frame assembly, I very lightly sanded the edges of the structure to even out all the high and low spots, but being very careful not to distort the overall shape of the thing, leaving it ready to run the longitudinal stringers, (laying on the table in the upper left of this image).

Jim.

Saturday, November 17, 2012

R-34 scale model project... Measuring and cutting out the ring disc formers

The next step was to pin the vertical keel blank directly over the work plan board so I could start assembly of the model. Then I took one of the half horizontal keel blanks and glued it on the axial line of the vertical keel at a 90 degree angle. After that I started to make the former discs. I  did this by measuring the radius of each ring number on my reference drawing with a good metal compass with a ball point pen mounted in it, instead of a pencil. Pens draw easier on balsa wood than a pencil does, with alot less point pressure. I transferred the setting on the compass and drew the circles onto the balsa, cut them out using an X-acto knife with a # 11 blade in the handle, and labeled each disc with its corresponding number on each quarter of the disc. This is because each complete disc must be cut into quarters for fitting in between the horizontal and vertical keels. The mid ship ring discs were pretty much all the same size. As you got towards the nose and the stern of the model, they got progressively smaller.
 Building it on the plan board like this, you can only start out building the right side of the hull, at first.
Above picture shows me putting a disc quarter in place. Sometimes, even after precisely measuring the rings on the plan, the discs still would not fit right. They would sometimes be too big or too small. I would have to either remove material from one of the flat edges, if it was too big, or add a straight shim to one of the flat edges of the quarter disc if it was too small. All the edges of the discs must be even with the edges of the keels for the shape of the overall hull to not be "lumpy".
The rest of these images show the progression of the making and installation of the quarter ring discs to the keels of the half-hull.


This bottom picture shows the completed port side keel and former assembly, with the starboard horzontal keel, and remaining quarter ring discs laying on the table in the ziplock bag, waiting to be assembled on the other side of the hull once it is unpinned and removed from the work plan board.

Jim.

Pensupreme and other vintage milk cartons... do people collect these?

 In the last year, I have noticed how a lot of people collect vintage glass milk bottles, which I remember when I was a kid, how the milkman...